2022. 3. 5. 14:14
애플


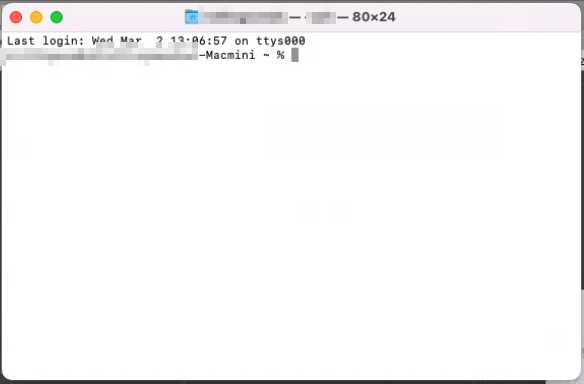
그럼 이렇게 뜬다

명령어는 이렇게 적고 엔터를 누르면 된다 (위는 cocoapods 설치명령어)
'애플' 카테고리의 다른 글
| 유니티 애플 인증 (0) | 2022.09.14 |
|---|---|
| 애플 TestFlight (0) | 2021.10.01 |
| 애플 용량 비우기 (0) | 2021.08.10 |


![]()


그럼 이렇게 뜬다
명령어는 이렇게 적고 엔터를 누르면 된다 (위는 cocoapods 설치명령어)
| 유니티 애플 인증 (0) | 2022.09.14 |
|---|---|
| 애플 TestFlight (0) | 2021.10.01 |
| 애플 용량 비우기 (0) | 2021.08.10 |
OSC는 Open Sound Controll의 약자이다
https://github.com/stella3d/OscCore/releases
Releases · stella3d/OscCore
A performance-oriented OSC library for Unity. Contribute to stella3d/OscCore development by creating an account on GitHub.
github.com
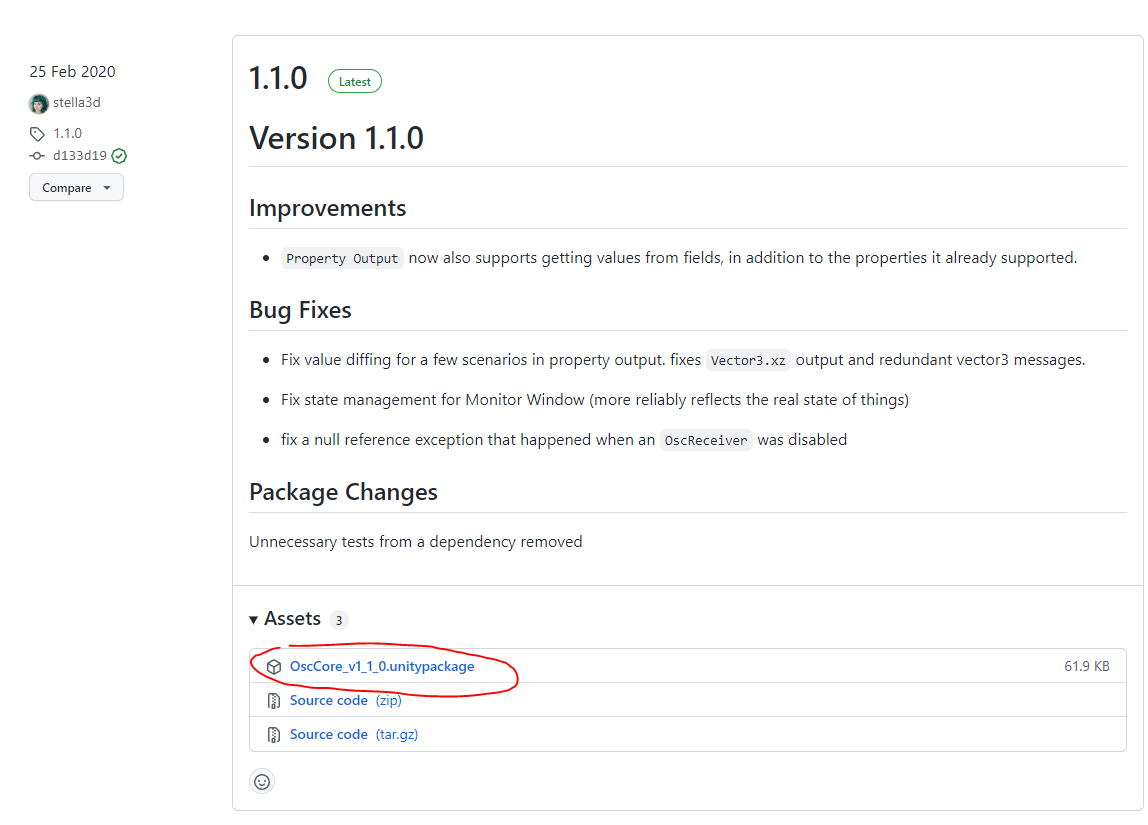
해당 패키지를 유니티에 푼다
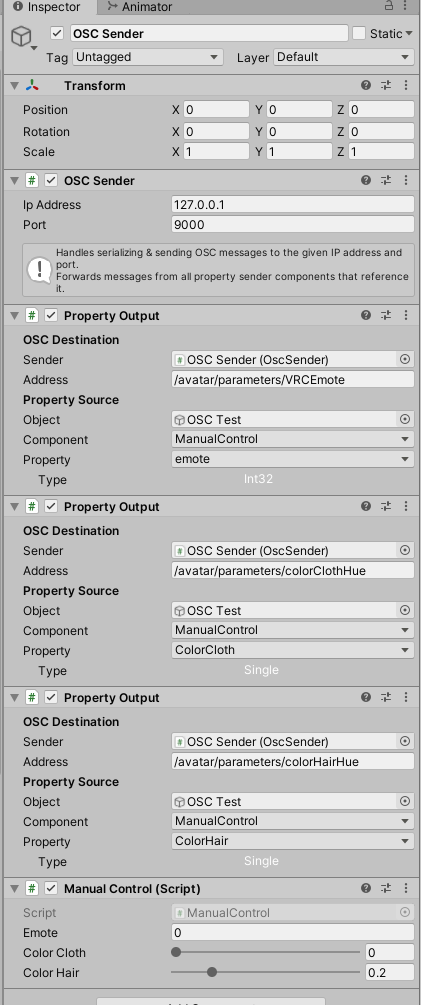
빈오브젝트를 만들어서 다음과 같이 컴포넌트를 배치한다
using System.Collections;
using System.Collections.Generic;
using UnityEngine;

public class ManualControl : MonoBehaviour
{

    public int emote = 0;
    [Range(0,1)]
    public float colorCloth = 0;
    [Range(0, 1)]
    public float colorHair = 0;
}
맨 아래 ManualControl의 샘플코드
위처럼 할당하고 수정하면 알아서 적용이 된다
그리고 인게임 내에서 OSC 키면 된다
끝
관련링크
https://hello.vrchat.com/blog/vrchat-osc-for-avatars
VRChat OSC for Avatars — VRChat
Our latest Open Beta update includes a long-awaited feature— Avatar OSC!
hello.vrchat.com
https://github.com/vrchat/osccore/tree/all-in-one
GitHub - vrchat/OscCore: A performance-oriented OSC library for Unity
A performance-oriented OSC library for Unity. Contribute to vrchat/OscCore development by creating an account on GitHub.
github.com
https://docs.vrchat.com/v2022.1.1/docs/osc-as-input-controller
OSC as Input Controller
OSC as Input Controller We support a lot of different controllers in VRChat - keyboard + mouse, gamepad, a plethora of VR trackers, etc. We're opening up that further by enabling you to control most of the inputs over OSC as well! With this, you could crea
docs.vrchat.com
| VRChat 캐릭터 압착되는 문제 (0) | 2023.01.01 |
|---|---|
| VRChat SDK 오류 모음 (0) | 2021.07.24 |
| 퀘스트 2에서 vrchat설치방법 (0) | 2021.05.11 |
| You have divergent branches and need to specify how to reconcile them (0) | 2022.05.17 |
|---|---|
| 깃허브 이슈관련 (0) | 2022.01.11 |
| unable to restore stash when changes are present on your branch (0) | 2021.11.22 |

SetPixel
public Texture2D texture2D;
void Start()
{
    texture2D = new Texture2D(512,1);
    for (int i = 0; i < 512; i++)
    {
        texture2D.SetPixel(i,0, new Color(1, (float)i / 512, 0, 0.25f));
    }
    texture2D.Apply();
}
SetPixels
public Texture2D texture2D;
void Start()
{
    var colors = new Color[512];
    for (int i = 0; i < 512; i++)
    {
        colors[i] = new Color(1, (float)i / 512, 0, 0.25f);
    }
    texture2D = new Texture2D(512, 1);
    texture2D.SetPixels(0, 0, texture2D.width, texture2D.height, colors);
    texture2D.Apply();
}
픽셀 불러오기
var pixels = tex.GetPixels(0, 0, tex.width, tex.height);
for (int x = 0; x < tex.width; x++)
{
    for (int y = 0; y < pixels.Length / tex.width; y++)
    {
        var index = y * tex.width + x;
        var pixel = pixels[index];
    }
}
렌더텍스처 픽셀 가져오기
원문코드는 이곳에서 가져왔다 https://docs.unity3d.com/kr/530/ScriptReference/RenderTexture-active.html
    static public Texture2D GetRTPixels(RenderTexture rt)
    {

        // Remember currently active render texture
        RenderTexture currentActiveRT = RenderTexture.active;

        // Set the supplied RenderTexture as the active one
        RenderTexture.active = rt;

        // Create a new Texture2D and read the RenderTexture image into it
        Texture2D tex = new Texture2D(rt.width, rt.height);
        tex.ReadPixels(new Rect(0, 0, tex.width, tex.height), 0, 0);

        // Restorie previously active render texture
        RenderTexture.active = currentActiveRT;
        return tex;
    }
위 코드 사용 예제
var texture = GetRTPixels(renderTexture);
var pixels = texture.GetPixels(0, 0, texture.width, texture.height, miplevel : 0);
Texture2D 빈 가장자리 제거
    static public Texture2D TrimTexture(Texture2D texture)
    {
        return TrimTexture(texture, Vector2.zero);
    }
    static public Texture2D TrimTexture(Texture2D texture,Vector2 padding)
    {
        var rect = new Rect(0, 0, texture.width, texture.height);

        {
            var pixels = texture.GetPixels(0, 0, texture.width, texture.height);
            //x
            for (int x = 0; x < texture.width; x++)
            {
                for (int y = 0; y < pixels.Length / texture.width; y++)
                {
                    var index = x + y * texture.width;
                    var pixel = pixels[index];
                    if (pixel.a > 0)
                    {
                        rect.x = x;
                        break;
                    }
                }
                if (rect.x != 0)
                {
                    break;
                }
            }

            //y
            for (int y = 0; y < pixels.Length / texture.width; y++)
            {
                for (int x = 0; x < texture.width; x++)
                {
                    var index = x + y * texture.width;
                    var pixel = pixels[index];
                    if (pixel.a > 0)
                    {
                        rect.y = y;
                        break;
                    }
                }
                if (rect.y != 0)
                {
                    break;
                }
            }

            //width
            for (int x = texture.width - 1; x >= 0; x--)
            {
                for (int y = pixels.Length / texture.width - 1; y >= 0; y--)
                {
                    var index = x + y * texture.width;
                    var pixel = pixels[index];
                    if (pixel.a > 0)
                    {
                        rect.width = x - rect.x;
                        break;
                    }
                }
                if (rect.width != texture.width)
                {
                    break;
                }
            }

            //height
            for (int y = pixels.Length / texture.width - 1; y >= 0; y--)
            {
                for (int x = texture.width - 1; x >= 0; x--)
                {
                    var index = x + y * texture.width;
                    var pixel = pixels[index];
                    if (pixel.a > 0)
                    {
                        rect.height = y - rect.y;
                        break;
                    }
                }
                if (rect.height != texture.height)
                {
                    break;
                }
            }
        }
        {
            var pixels = texture.GetPixels((int)rect.x, (int)rect.y, (int)rect.width, (int)rect.height);
            var trimTexture = new Texture2D((int)rect.width+ (int)padding.x*2, (int)rect.height + (int)padding.y * 2);
            var defaultPixels = new Color[trimTexture.width * trimTexture.height];
            System.Array.ConvertAll(defaultPixels,x=>new Color(0,0,0,0));
            trimTexture.SetPixels(0, 0, trimTexture.width, trimTexture.height, defaultPixels);
            trimTexture.SetPixels((int)padding.x, (int)padding.y, (int)rect.width, (int)rect.height, pixels);
            trimTexture.Apply();
            return trimTexture;
        }
    }
RGB만 바꾸기
만들고 보니 쓸모가 없어졌네
    /// <summary>
    /// rgb만 바꾸고 a는 그냥 놔둠
    /// </summary>
    /// <param name="texture"></param>
    /// <param name="color"></param>
    static public void ChangeRGB(Texture2D texture,Color color)
    {
        var pixels = texture.GetPixels(0, 0, texture.width, texture.height);
        for (int x = 0; x < texture.width; x++)
        {
            for (int y = 0; y < pixels.Length / texture.width; y++)
            {
                var index = x + y * texture.width;
                pixels[index].r = color.r;
                pixels[index].g = color.g;
                pixels[index].b = color.b;
            }
        }
        texture.SetPixels(0, 0, texture.width, texture.height, pixels);
    }
SaveRenderWindow
https://gist.github.com/ahzkwid/10974a8f59c215ea02a9e5a35e533f66
using System.Collections;
using System.Collections.Generic;
using UnityEngine;
using UnityEngine.UI;

#if UNITY_EDITOR
//https://gist.github.com/ahzkwid/10974a8f59c215ea02a9e5a35e533f66

using UnityEditor;

[InitializeOnLoad]
class SaveRenderWindow : EditorWindow
{
    public RenderTexture targetRenderTexture;

    [UnityEditor.MenuItem("Ahzkwid/" + nameof(SaveRenderWindow))]
    public static void Init()
    {
        GetWindow<SaveRenderWindow>(false, nameof(SaveRenderWindow));
    }
    SerializedObject serializedObject;
    void OnGUI()
    {
        if (serializedObject == null)
        {
            serializedObject = new SerializedObject(this);
        }
        serializedObject.Update();
        {
            EditorGUILayout.Space();
            EditorGUILayout.PropertyField(serializedObject.FindProperty(nameof(targetRenderTexture)));
        }
        serializedObject.ApplyModifiedProperties();
        if (GUILayout.Button("Save"))
        {
            SaveRenderTexture();
        }
    }
    static public Texture2D GetRTPixels(RenderTexture rt)
    {
        //https://docs.unity3d.com/kr/530/ScriptReference/RenderTexture-active.html
        RenderTexture currentActiveRT = RenderTexture.active;
        RenderTexture.active = rt;

        Texture2D tex = new Texture2D(rt.width, rt.height);
        tex.ReadPixels(new Rect(0, 0, tex.width, tex.height), 0, 0);
        RenderTexture.active = currentActiveRT;
        return tex;
    }
    public void SaveRenderTexture()
    {
        if (targetRenderTexture != null)
        {
            var fileName = $"{System.DateTime.Now.Ticks}";
            var folderPath = $"{Application.persistentDataPath}";
            var filePath = $"{folderPath}/{fileName}.png";

            if (System.IO.Directory.Exists(folderPath) == false)
            {
                System.IO.Directory.CreateDirectory(folderPath);
            }
            var texture2D = GetRTPixels(targetRenderTexture);
            //var texture2D = new Texture2D(targetRenderTexture.width, targetRenderTexture.height, TextureFormat.RGBA32, false);
            //texture2D.SetPixels(targetRenderTexture.GetPixels());
            var bytes = texture2D.EncodeToPNG();
            System.IO.File.WriteAllBytes(filePath, bytes);

            System.Diagnostics.Process.Start(folderPath);
        }
    }
}
#endif
| 유니티 IOS 인터페이스 (0) | 2022.02.25 |
|---|---|
| 유니티 안드로이드 동영상 관련자료 (0) | 2022.02.11 |
| 유니티 pb stl 사용법 (0) | 2022.02.08 |


