2019.3 버전일경우
stackoverflow.com/questions/31636408/write-unity-ios-plugin-in-swift-code
이후버전일경우 참고자료
qiita.com/mao_/items/2305822054dadb2c5da8
qiita.com/ohbashunsuke/items/8f3b7c733fc70a180941
유니티 내부에 세가지 파일을 만들어 준다
Plugins/iOS/Bridge.mm
Plugins/iOS/SwiftTest .swift
Scriptes/SwiftTest.cs
Bridge.mm과 SwiftTest .swift는 텍스트문서를 이용해 만들고 확장자를 바꿔준다.
그리고 아래같이 입력해준다
Bridge.mm과 SwiftTest .swift는 텍스트문서로 열거나 IDE로 열면 된다.
//SwiftTest.cs

using System.Collections;
using System.Collections.Generic;
using System.Runtime.InteropServices;
using UnityEngine;

public class SwiftTest : MonoBehaviour
{
    [DllImport("__Internal")]
    private static extern void callSwiftTestFunc();

    void Start()
    {
        Press();
    }


    public void Press()
    {
        callSwiftTestFunc();
    }
}
//Bridge.mm
#import <UnityFramework/UnityFramework-Swift.h>
extern "C" {
void callSwiftTestFunc() {
[SwiftTest testFunc];
}
}//SwiftTest.swift
import Foundation
@objc public class SwiftTest : NSObject {
@objc public static func testFunc() {
print("Swift Test")
}
}
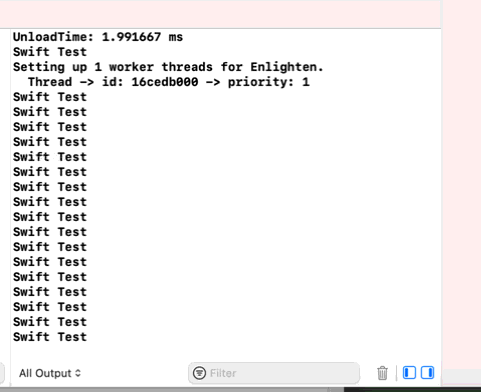
빌드하고 실행해서 실행해보면 다음과 같이 xcode 로그에 뜬다
인자받을수 있게 개조할것이다
//SwiftTest.cs

using System.Collections;
using System.Collections.Generic;
using System.Runtime.InteropServices;
using UnityEngine;

public class SwiftTest : MonoBehaviour
{
    [DllImport("__Internal")]
    private static extern void callSwiftTestFunc();


    [DllImport("__Internal")]
    private static extern void callSwiftTestFunc2(string text);


    void Start()
    {
        Press();
    }


    public void Press()
    {
        callSwiftTestFunc();
        callSwiftTestFunc2(Time.time.ToString());
    }
}
//Bridge.mm
#import <Foundation/Foundation.h>
#import <UnityFramework/UnityFramework-Swift.h>
extern "C" {
void callSwiftTestFunc() {
[SwiftTest testFunc];
}
void callSwiftTestFunc2(const char *text) {
[SwiftTest testFunc2 :[NSString stringWithUTF8String:text]];
}
}//SwiftTest.swift
import Foundation
@objc public class SwiftTest : NSObject {
@objc public static func testFunc() {
print("Swift Test")
}
@objc public static func testFunc2(_ text: String) {
print("Swift Test2\(text)")
}
}
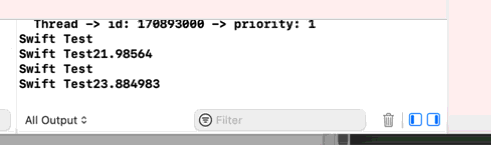
결과
하지만 함수는 리턴값이 있어야 쓸만하지 않은가
그래서 한번 더 개조했다
참고한곳 : stackoverflow.com/questions/37047781/how-to-return-string-from-native-ios-plugin-to-unity
//SwiftTest.cs

using System.Collections;
using System.Collections.Generic;
using System.Runtime.InteropServices;
using UnityEngine;
using UnityEngine.UI;

public class SwiftTest : MonoBehaviour
{
    [DllImport("__Internal")]
    private static extern void callSwiftTestFunc();


    [DllImport("__Internal")]
    private static extern void callSwiftTestFunc2(string text);


    [DllImport("__Internal")]
    private static extern int callSwiftTestFunc3();


    [DllImport("__Internal")]
    private static extern string callSwiftTestFunc4();


    public Text UItext;


    void Start()
    {
    }


    public void Press()
    {
        callSwiftTestFunc();
        callSwiftTestFunc2(Time.time.ToString());
        UItext.text = callSwiftTestFunc3().ToString();
        UItext.text +="\n"+callSwiftTestFunc4().ToString();
    }
}
//Bridge.mm
#import <Foundation/Foundation.h>
#import <UnityFramework/UnityFramework-Swift.h>
extern "C" {
void callSwiftTestFunc()
{
[SwiftTest testFunc];
}
void callSwiftTestFunc2(const char *text)
{
[SwiftTest testFunc2 :[NSString stringWithUTF8String:text]];
}
int callSwiftTestFunc3()
{
return [SwiftTest testFunc3];
}
char* callSwiftTestFunc4()
{
NSString* nsStr=[SwiftTest testFunc4];
const char* nsStrUTF8=(char*)[nsStr UTF8String];
char* cString=(char*)malloc(strlen(nsStrUTF8)+1);
strcpy(cString, nsStrUTF8);
return cString;
}
}import Foundation
@objc public class SwiftTest : NSObject
{
@objc public static func testFunc()
{
print("Swift Test")
}
@objc public static func testFunc2(_ text: String)
{
print("Swift Test2\(text)")
}
@objc public static func testFunc3() -> Int
{
print("testFunc3")
return (Int)(NSDate().timeIntervalSince1970)
}
@objc public static func testFunc4() -> String
{
print("testFunc4")
let dateFormatter = DateFormatter()
dateFormatter.dateFormat = "yyyy-MM-dd HH:mm:ss"
return dateFormatter.string(from:Date())
}
}
잘된다